A product folder lets you organise your products and how they appear on your point of sale device in whatever way works best for your business.
A common way to organize your product folders is by product group, such as “Food” and “Drinks” or “Clothing” and “Accessories.”
Folders can also be nested within folders, so you could create a "Lunch Menu" folder with "Drinks", "Starters", and "Mains" folders within it.
Below we'll explain how to create and nest product folders using "Drinks" as an example.
-
Yes
-
No
- Add Button
Step 1
Logging in
To get started, log in to your Loomis–Pay portal by going to portal.loomispay.com and entering your email and password.
If you don't remember your login credentials, click the Forgotten your Password link.
Step 2
Create a product folder
Once you’ve added all of your products into your Loomis–Pay portal, it’s time to organise them into product folders that will appear on your point of sale.
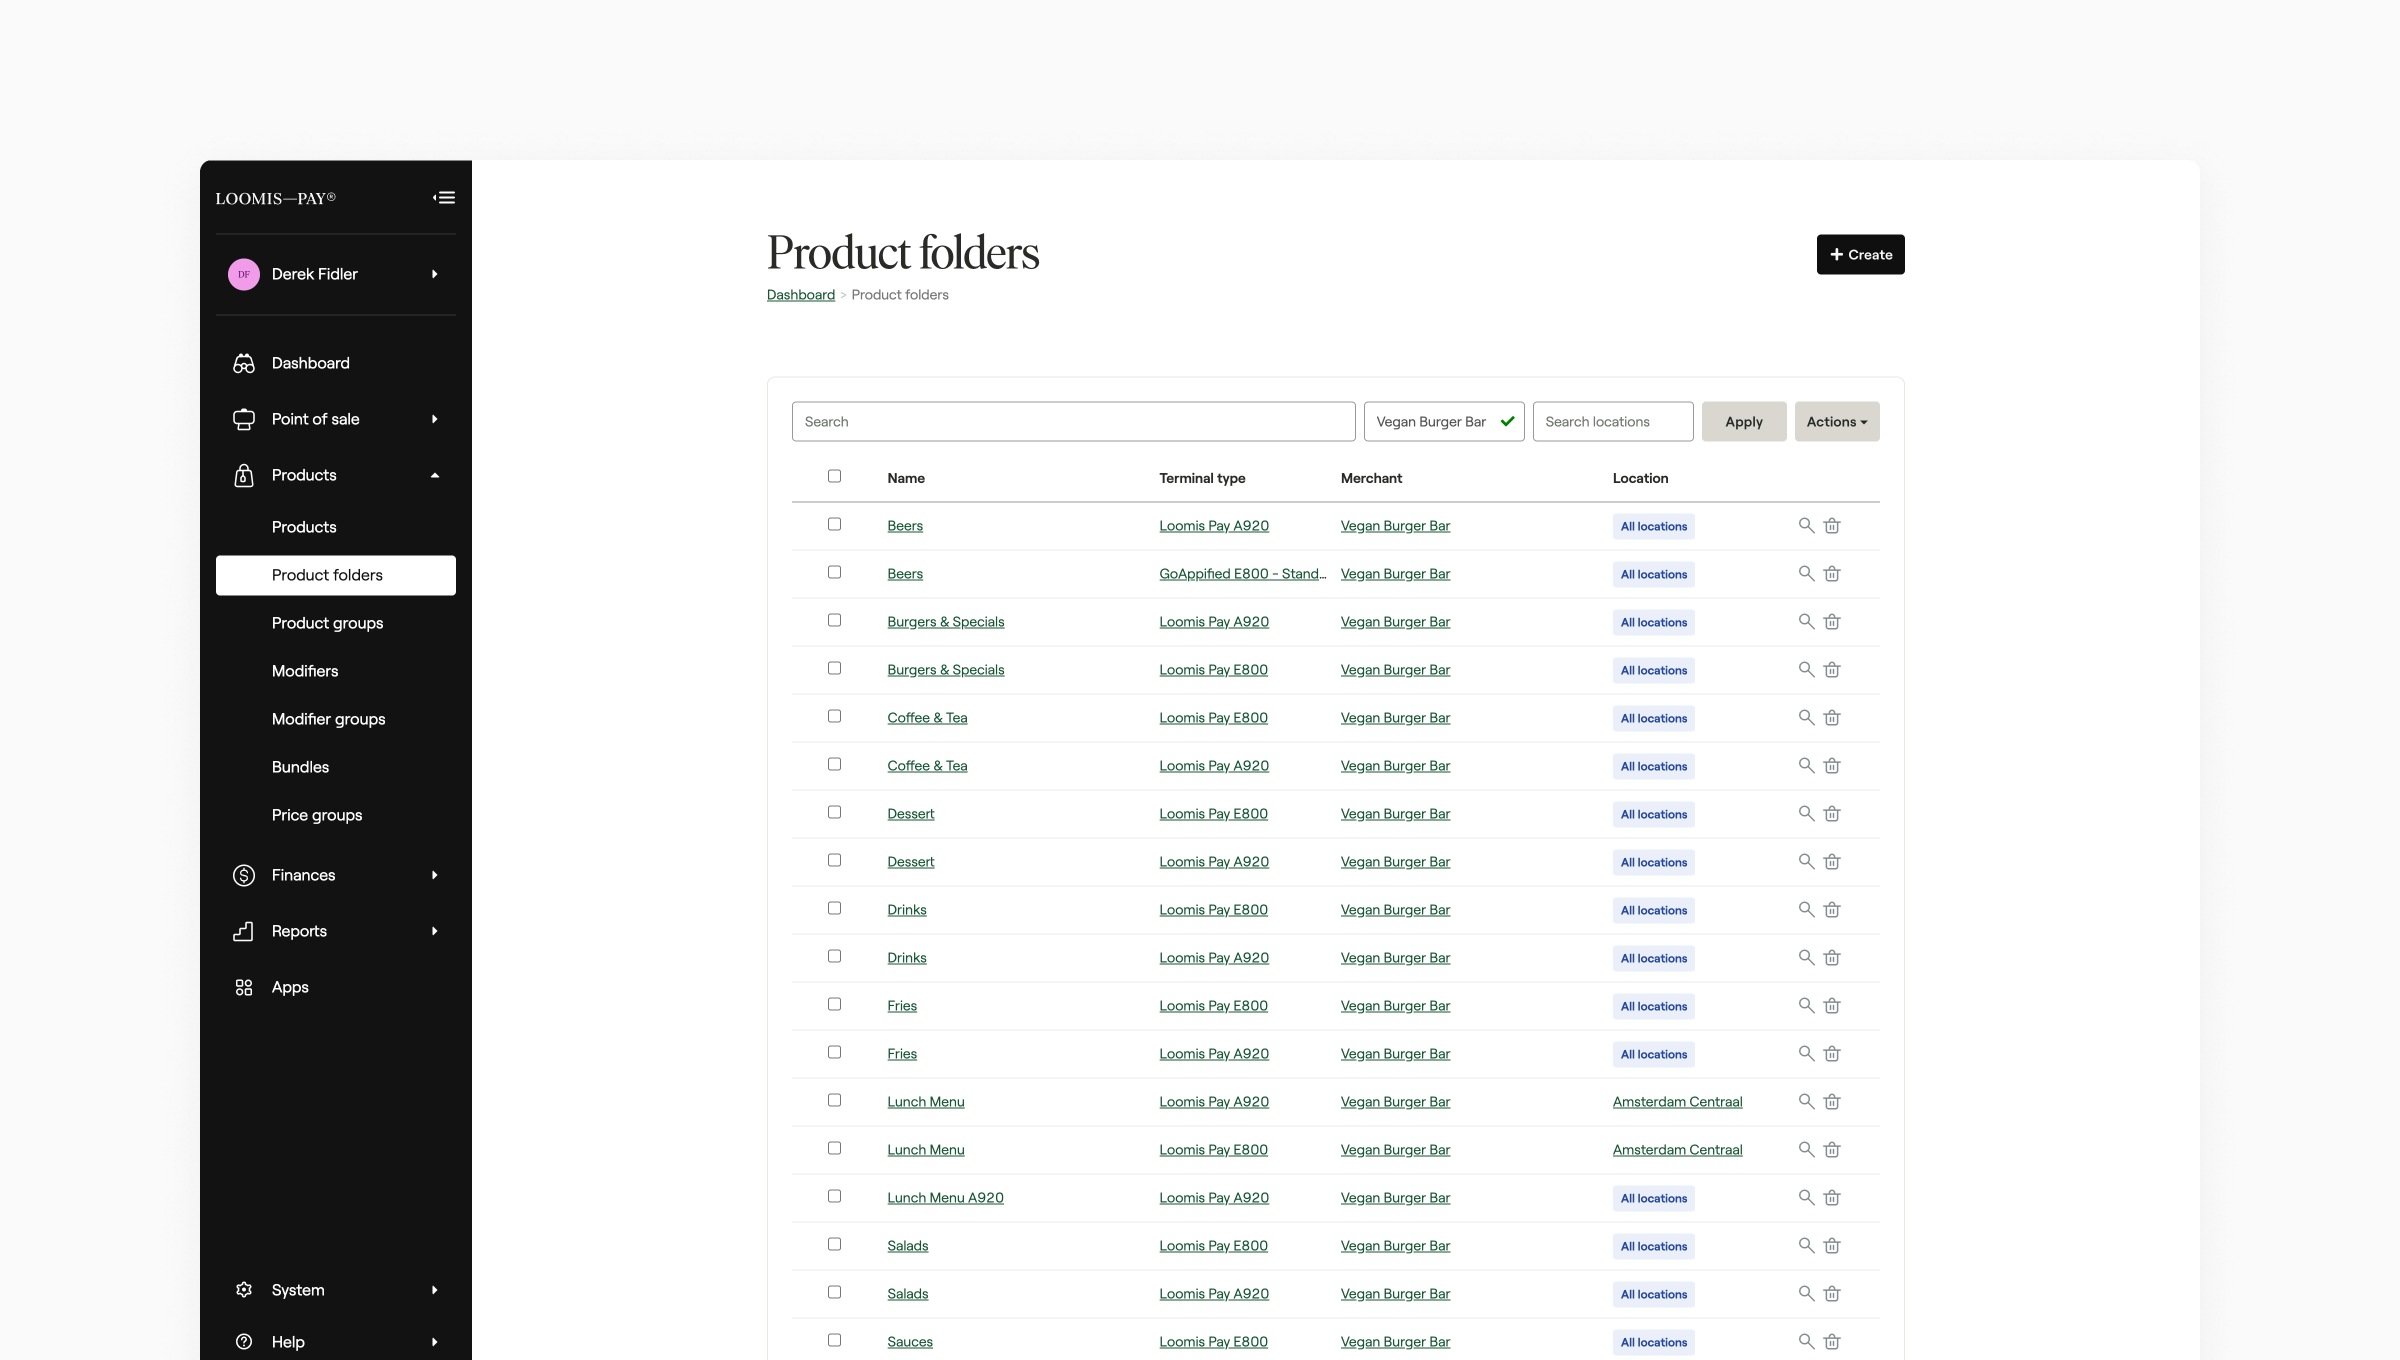
1. Click on Products > Product Folders in the navigation menu.
2. Click Create in the top right corner.
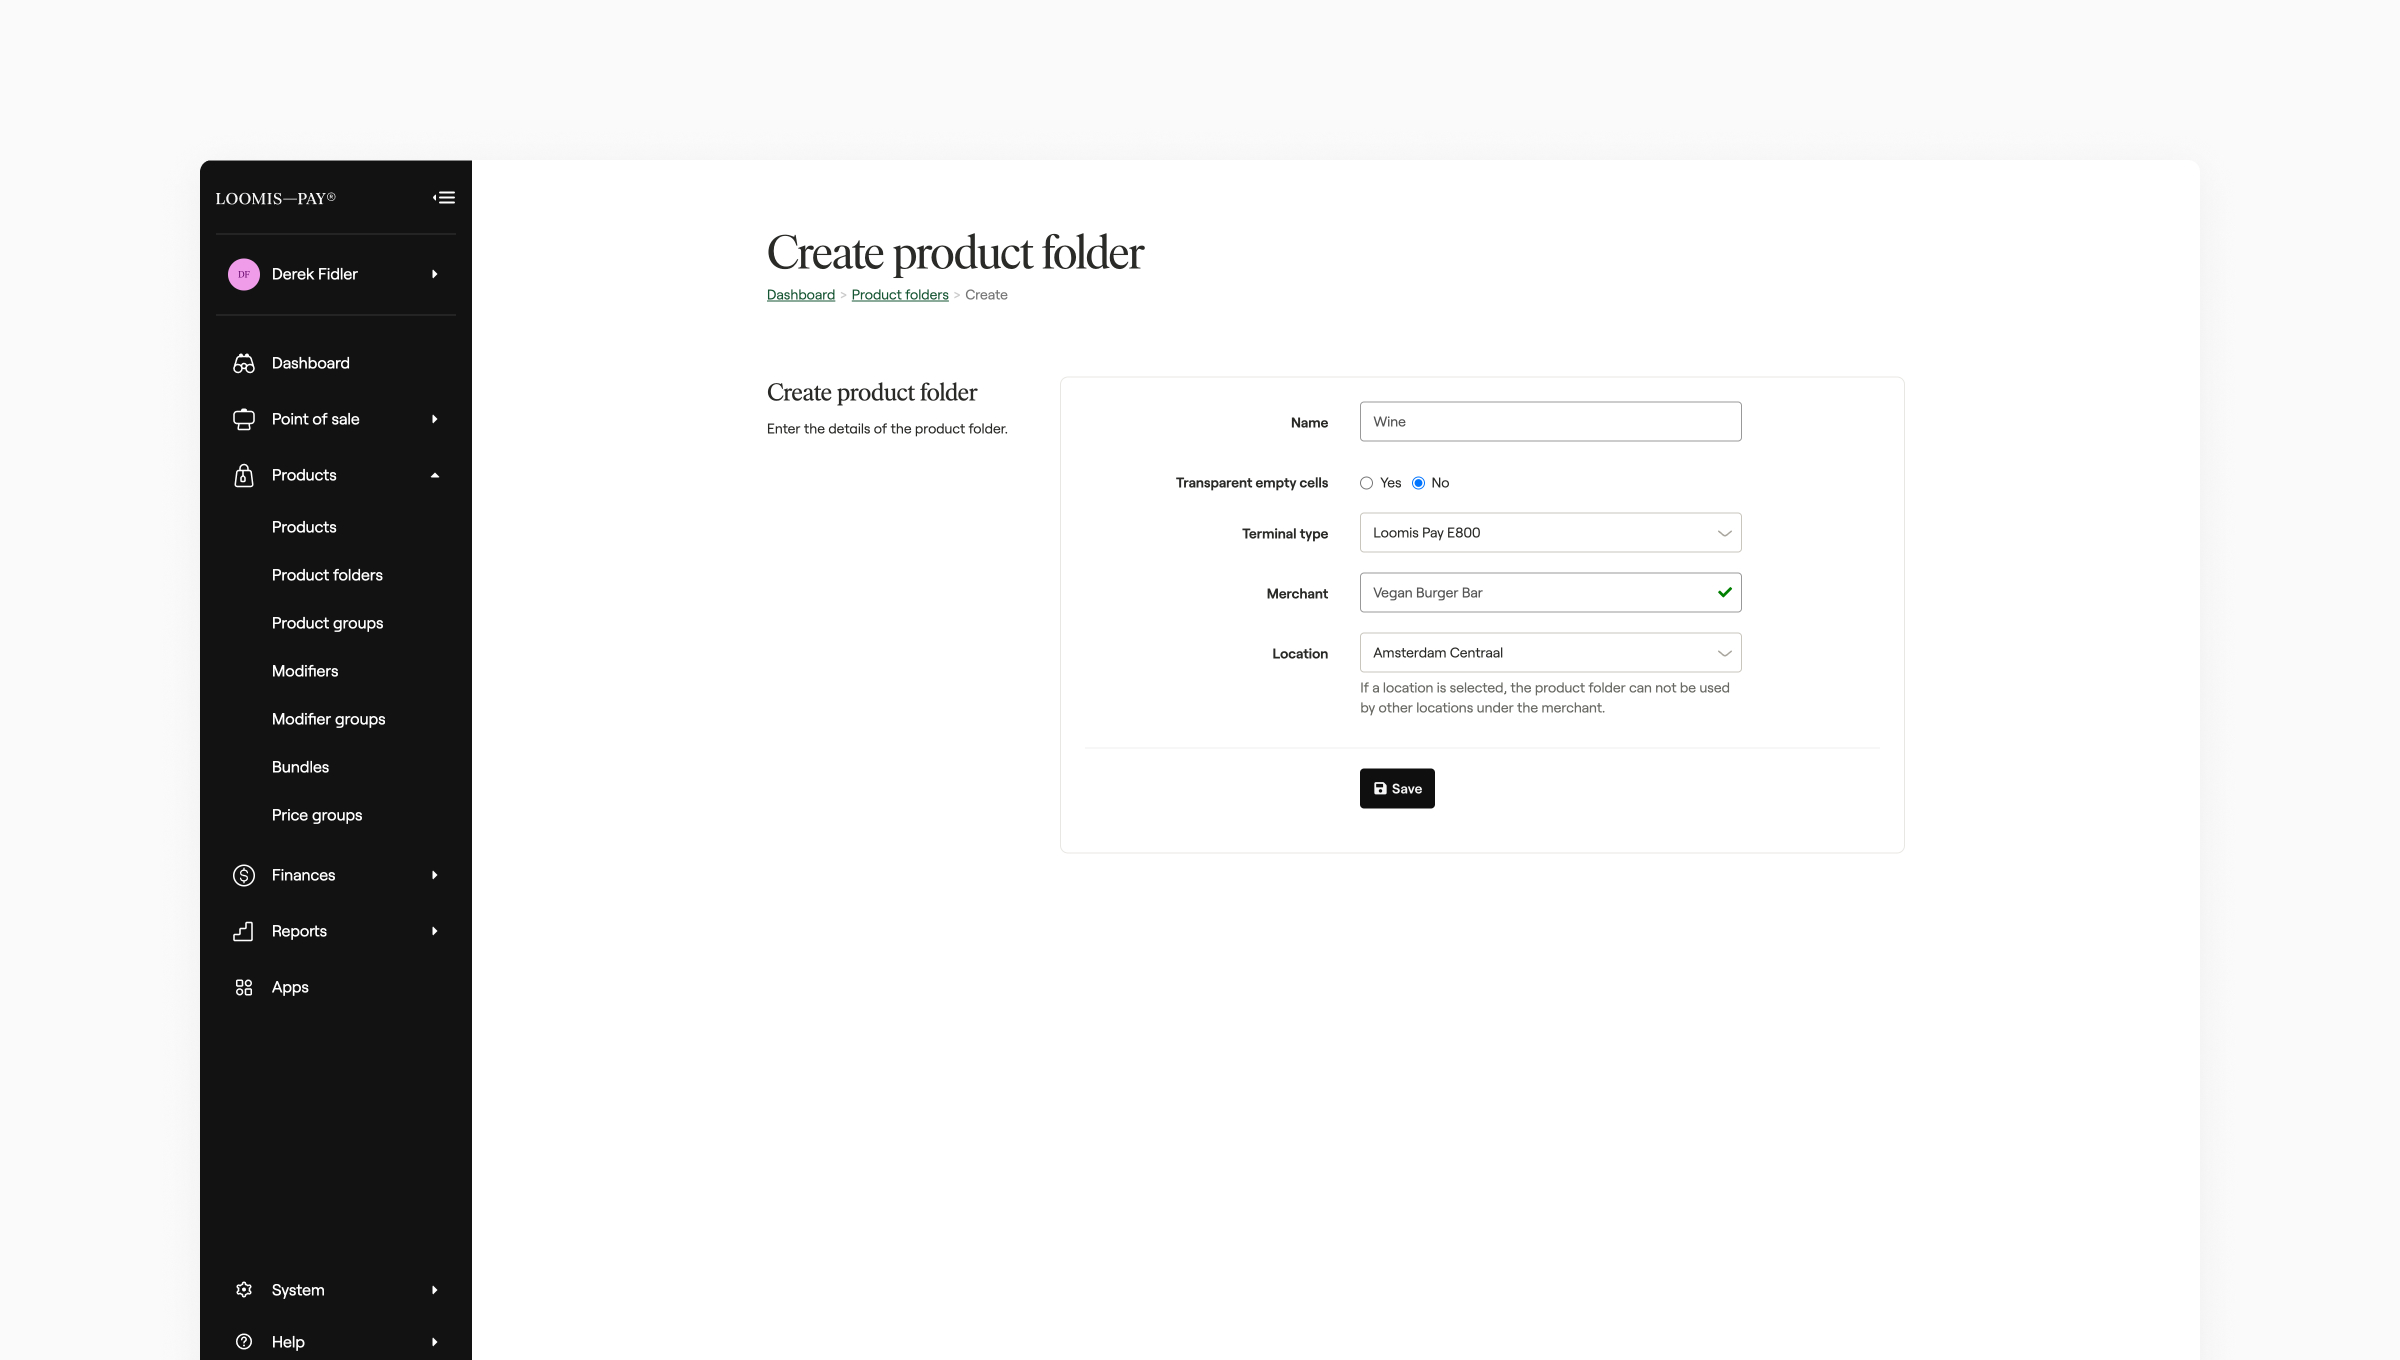
3. Give your folder a name, like "Drinks", and select which point of sale terminal type you'd like this product folder to appear on. When ready, click Save.
You'll be returned to the Product Folders list and notified that your new folder was saved successfully.
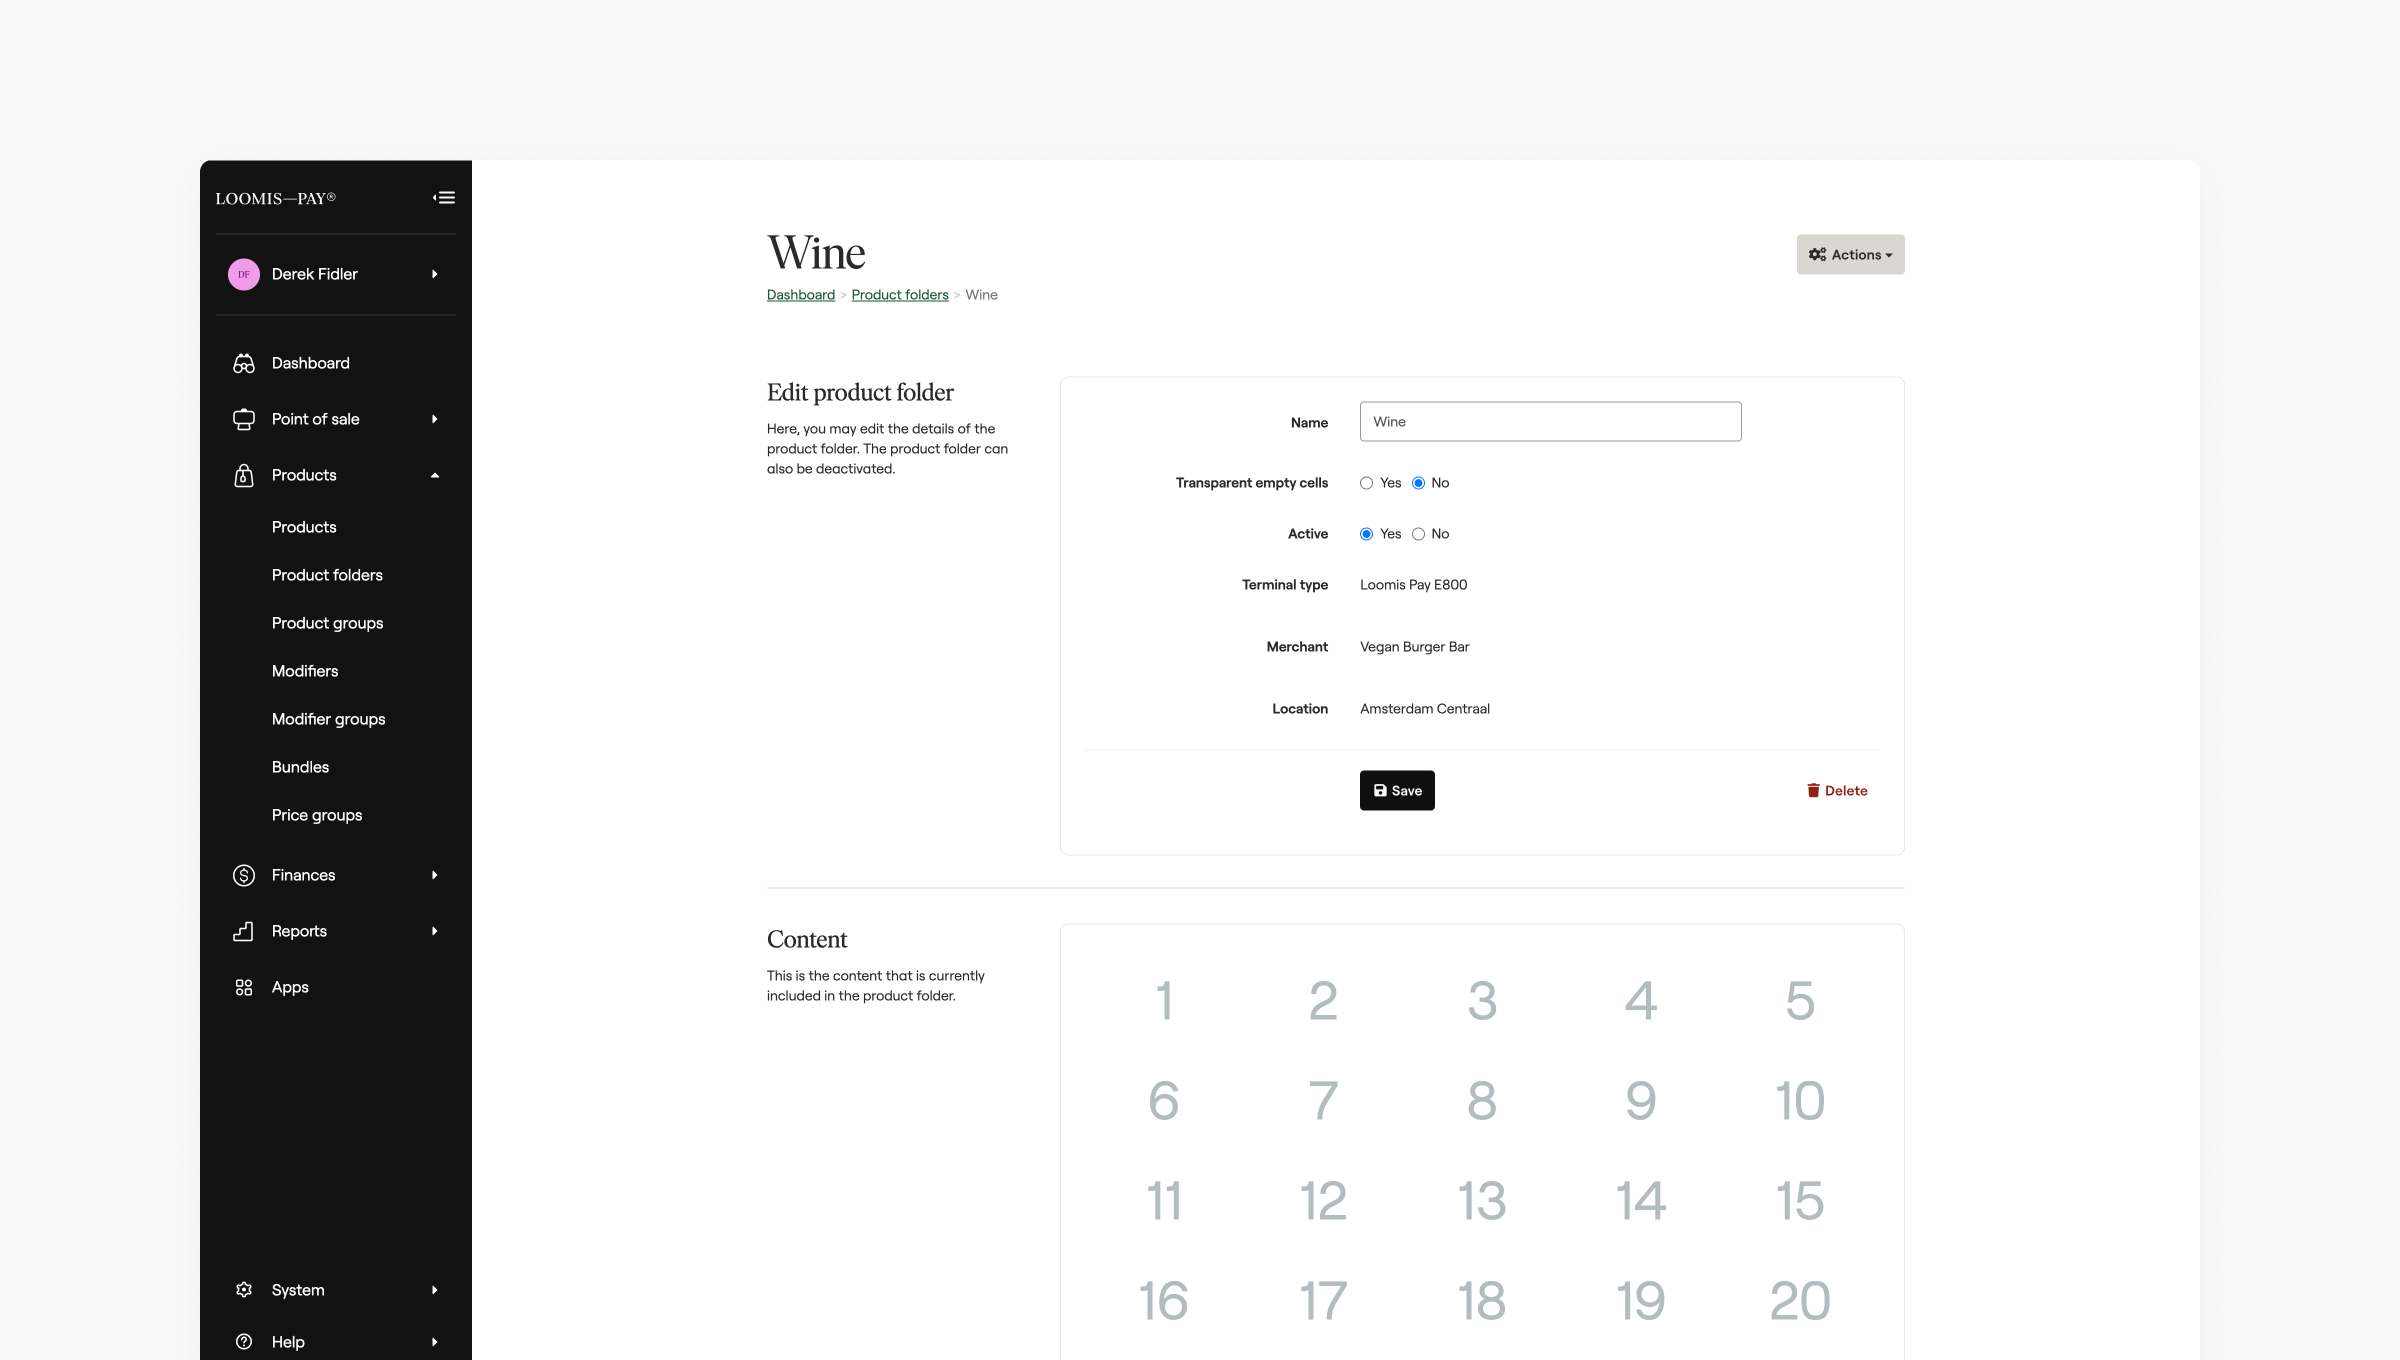
4. Click on the product folder you just created from the list. In the Content section on this screen, you'll see a grid of numbered tiles that matches the terminal type you selected in the previous step.
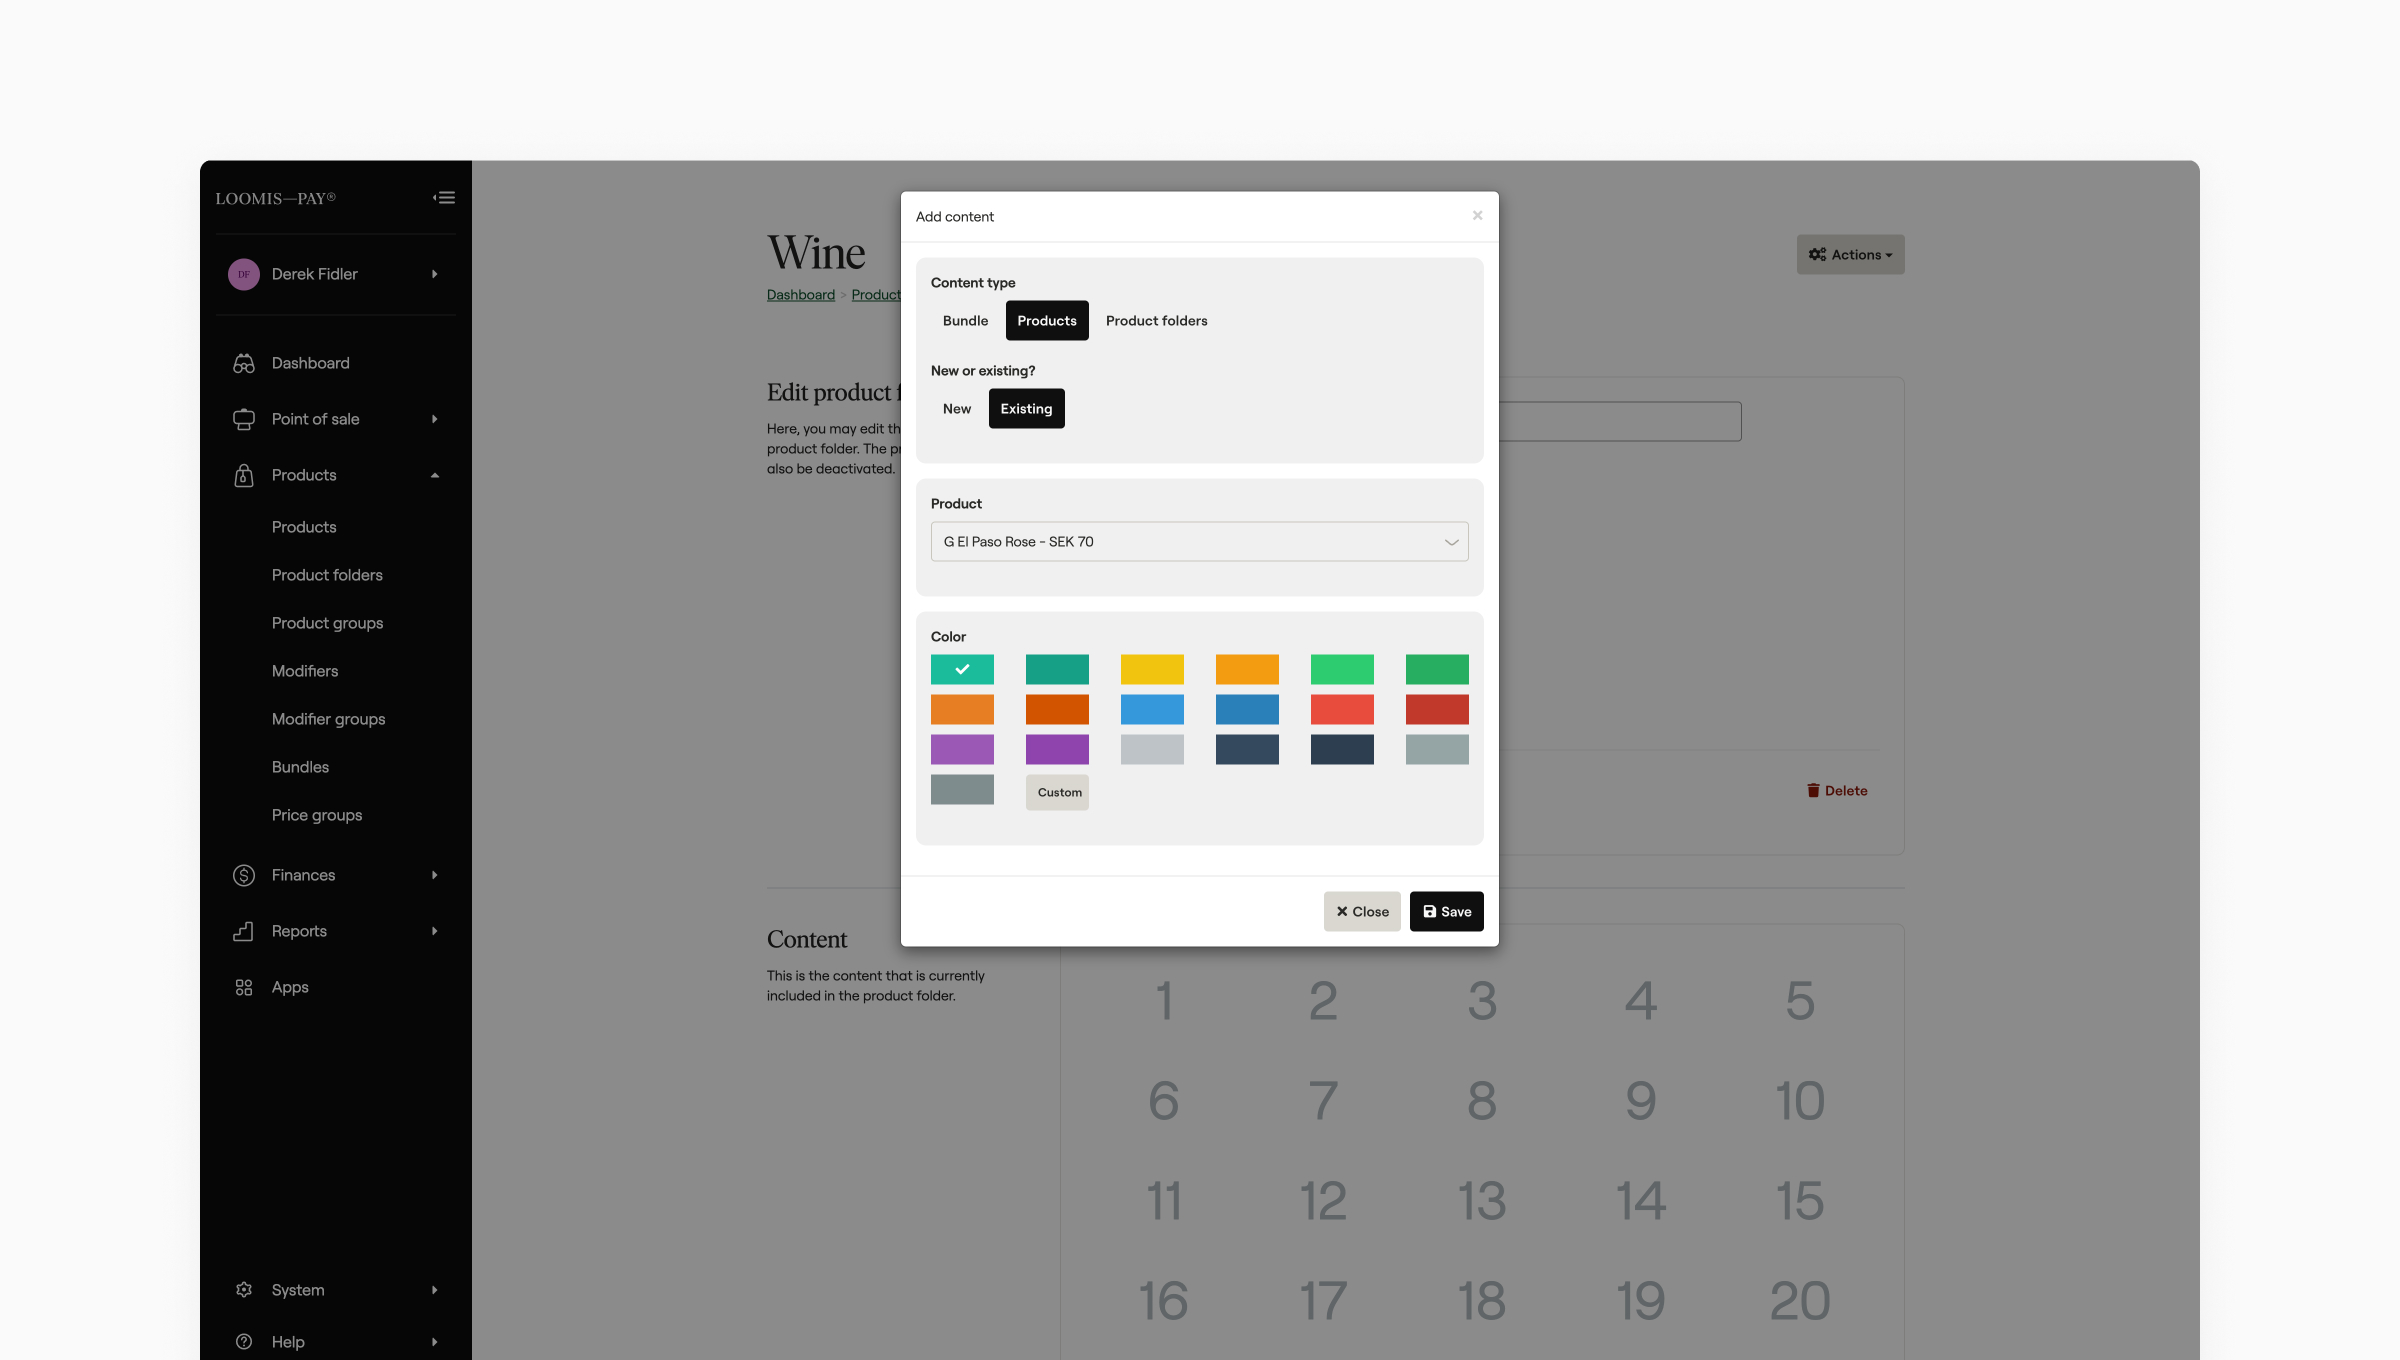
5. To add a product to the grid, click a tile number and a new dialog will appear. You can choose if you'd like to add a product, a bundle, or nest another product folder in this tile space.
Click Product for now. Then choose Existing and then select the product from your product catalog. Finally, choose a color for the tile and click Save.
6. Repeat adding products to the grid until you are satisfied.
You can rearrange the tiles by clicking and dragging the "☰" symbol in the top left of each tile, or resize your tiles by clicking and dragging the arrow in the bottom right corner of each tile.
7. The product folder is saved as soon as you make changes so you can leave this page at any time without losing your work.
Step 3
Nesting product folders
Once you’ve created a product folder for each of your product categories, you can link them all together inside a main folder, for example nesting "Drinks" and "Starters" within a "Lunch" or "Dinner" menu.
1. Start by creating a new product folder, for example "Dinner". Then navigate to it from the Product Folders list.
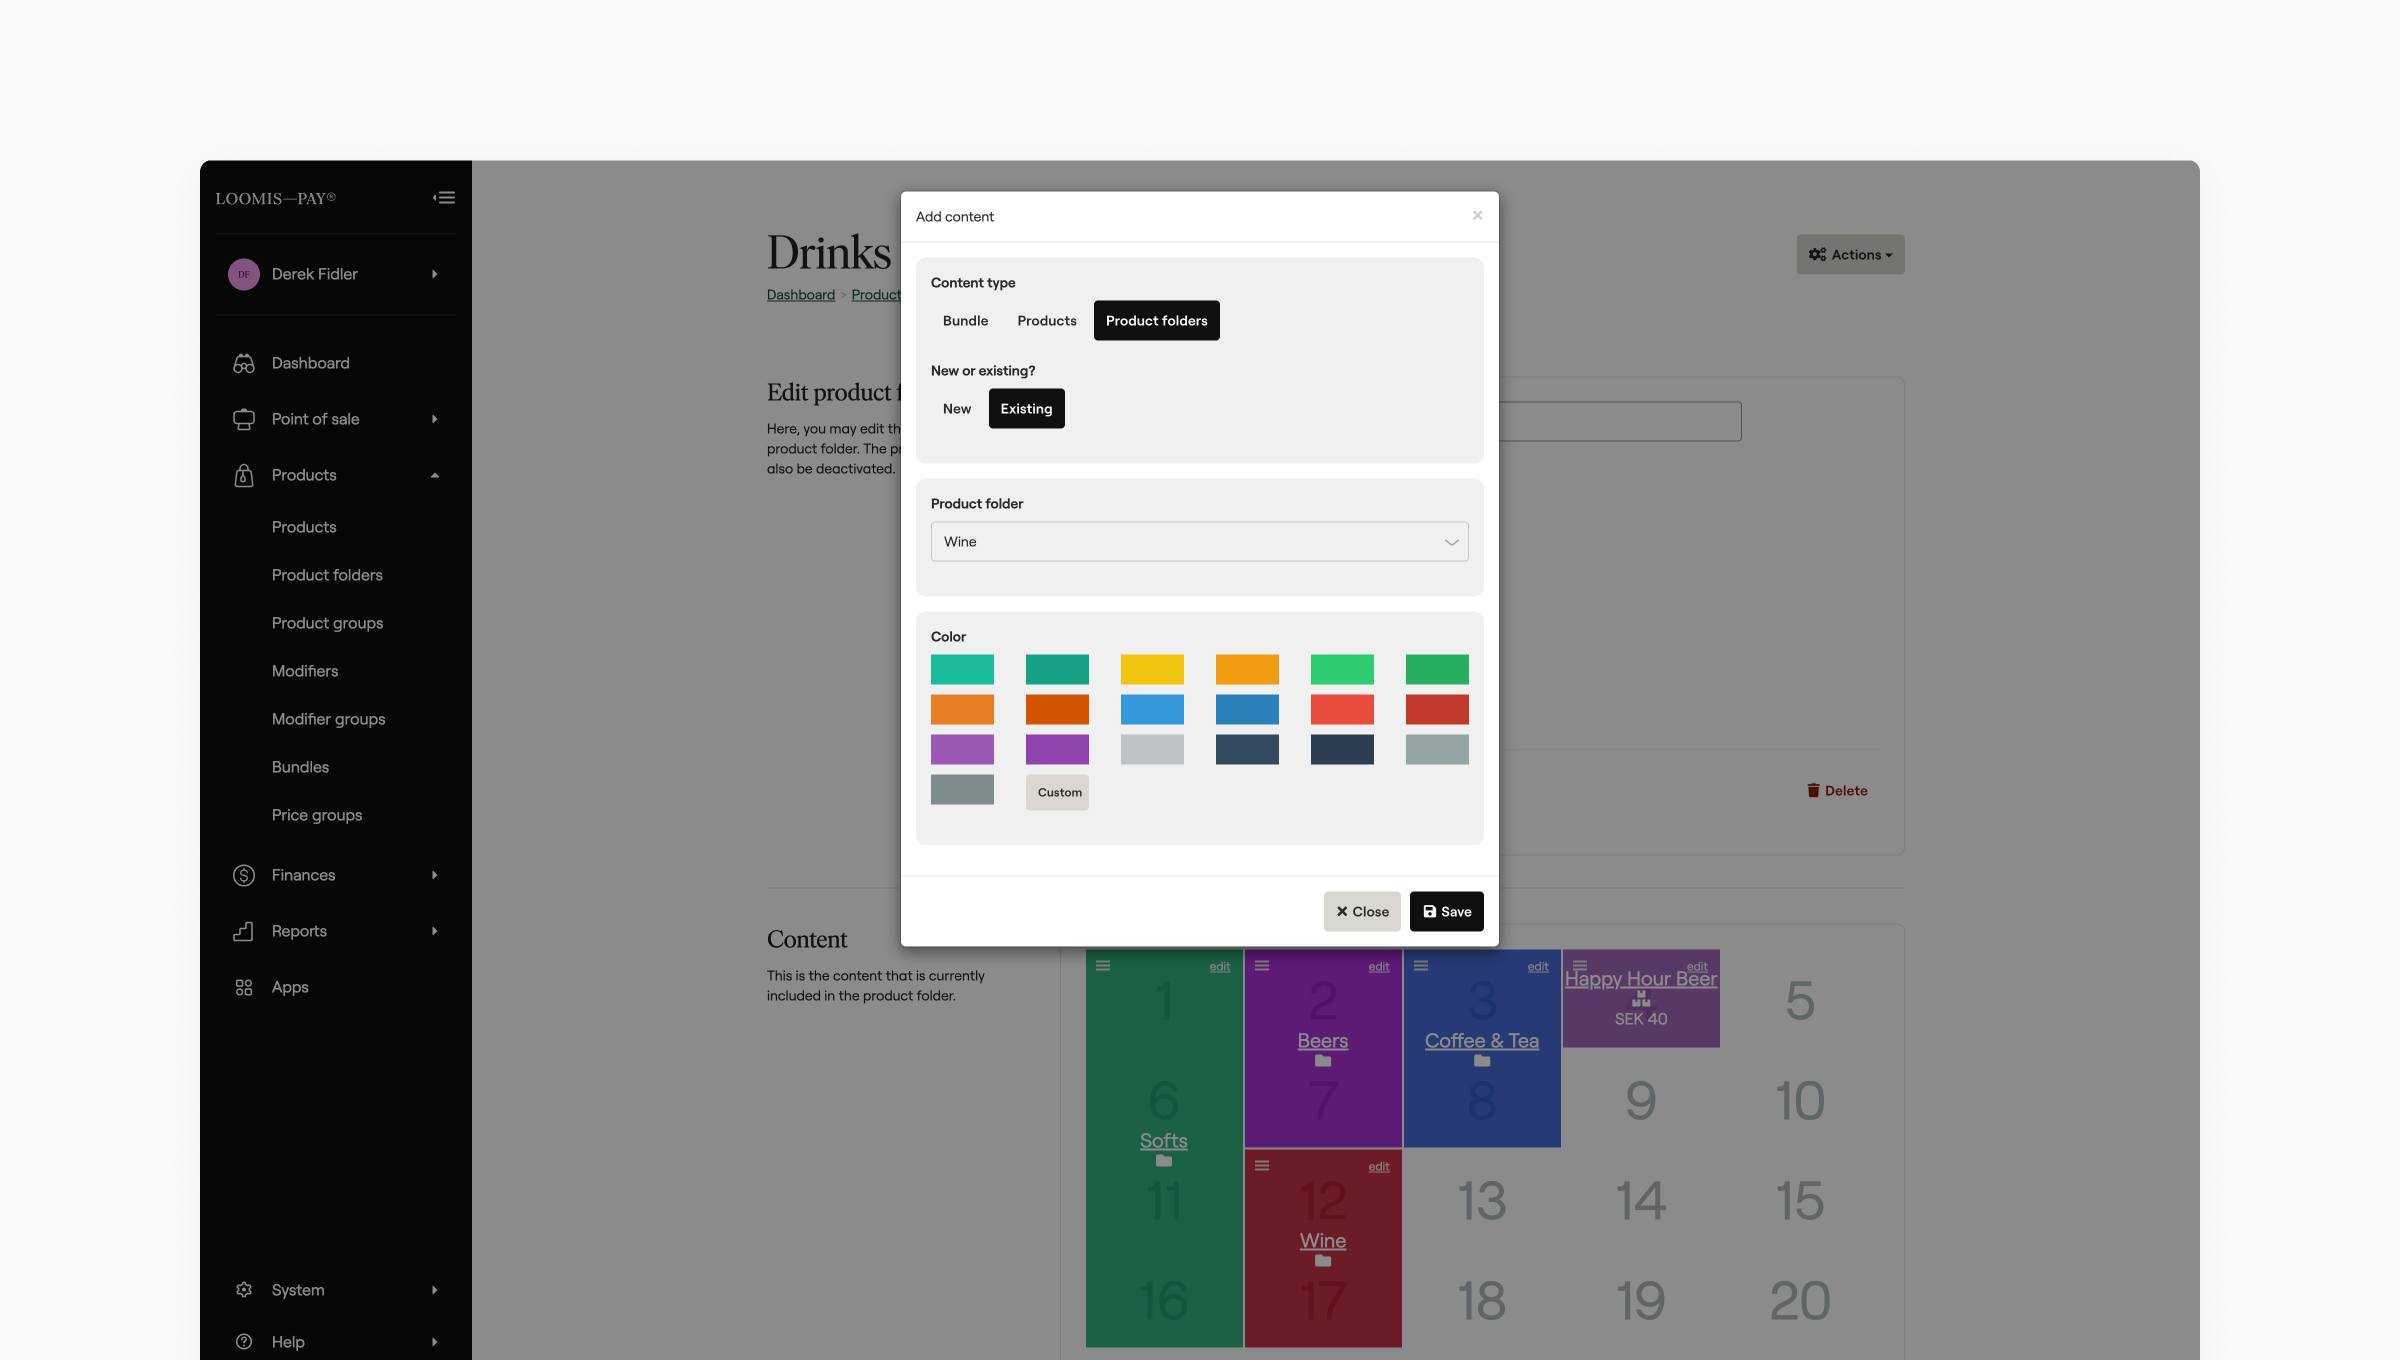
2. Select a number tile in the Content section. This time, choose Product Folders for the content type.
Choose Existing, and then select the "Drinks" folder you created already. Pick a color and then click Save.
3. Now your staff can access your "Drinks" folder from within the parent folder you just created. Finish adding the additional grid items you would like for this product folder. Don't forget you can also add individual products and product bundles alongside nested product folders in the grid.