Kitchen Management
In our Kitchen Management tool, you can set up kitchen printers and displays to work together with the POS terminal. You have the possibility to send servings to the kitchen in a manual or semi-automatic manner and select which dishes or products that gets showed or printed on which output in the kitchen.
Requirements:
- You need to have a minimum of 1 printer to use the Kitchen Management tool.
Get started
These are the main steps you need to cover:
1. Make sure you have a Printer connected (click here: portal.loomispay.com/connections)
2. Set up your Stations together with the above
3. Set up your Courses (optional)
Setting up the Station(s)
1. Go to Apps and then click on Kitchen Management
2. In this view you will see your Locations – select the one you want to setup
3. You will be presented by our overview, to make sure you have all things in place
- Adding Courses is optional, find more information further down the article.
4. Click on Add station
5. Add a relevant name for the station - I.e. Grill or Kitchen 1
6. Select the station type; Printer
7. Select a device to use for this station.
- You can select to show Order ID (which is longer unique ID) on the kitchen ticket
- You can select to show the Order-call-out number (which is reset every day) on the kitchen ticket
8. Under Advanced, you have different possibilities:
- Font size: This is the size of the printed font on the actual kitchen ticket.
- Printed ticket duplicates: This is how many copies you want printed – usually only set to 1.
- (Optional as part of the Automation): Task Completion Time on Printers: This is used, when you want to use automation on the printed ticket. In example, if you want to have the order go to the next course automatically, because the kitchen is done with this one. Enter the time in minutes.
- Language: This is the language used on the kitchen ticket. Of course, the product will not be translated – only the other wording.
- Print/Show the products immediately: This will – no matter what – print/show everything related to this printer immediately – no matter what automations has been set.
9. Choose Products to send to this station
- If the toggle “Send all products to this station” is set to on, then all products on any order will be printed/showed on the station. That’s a usual set up if you only have 1 printer/KDS and want everything to go this.
- If the toggle is not set – then you will have to find all products that should be printed/showed on this station. Search them, add them and remember to click save.
Setting up Courses (optional)
Courses is optional – and you do not need to set this up, if you don’t have the need to send products as courses to the kitchen.
1. Settings (Optional – used for automation):
- “Initial delay” - The time it should take before the first course is started. If you want the first course to automatically start after 2 minutes, you enter 2 in the field. If you leave it blank – it will not be started automatically. If you enter 0, it will start immediately.
2. Click on Add course
3. Give the course a name – it could be: “Entree” or “Mains” etc.
4. Delay before starting next course:
- If you want to control the courses fully manual from the POS, then the field should be left blank.
- If you want to start the next course AFTER automatically, then set the delay in minutes before that should be started. I.e. 15 minutes.
- In this case, the course AFTER will start after 15 minutes
- Add products to the course by searching and selecting them. Click on Add products to put them on the course
- Click Save to save the course
5. In the view below, you can now see your course. IF you add more courses, you can sort them by dragging and dropping them. The sorting is important, if you have automation and when showing it in the POS.
Examples of setups
Pizzeria, Café or similar with one kitchen station to print/show tickets to |
Restaurant, Larger Café or similar with one or multiple kitchen stations and serving in courses |
|
|
Using Courses on the POS
Courses on the POS is only available if you configured Courses in the above guide. When enabled and configured, please log out and in on the POS to enable it.
How does it work?
- Go to the table view and select a table – it will go to the menu/order view.
- Add some items to the cart as usual.
- When you have done that – click on the “Add to table” button.
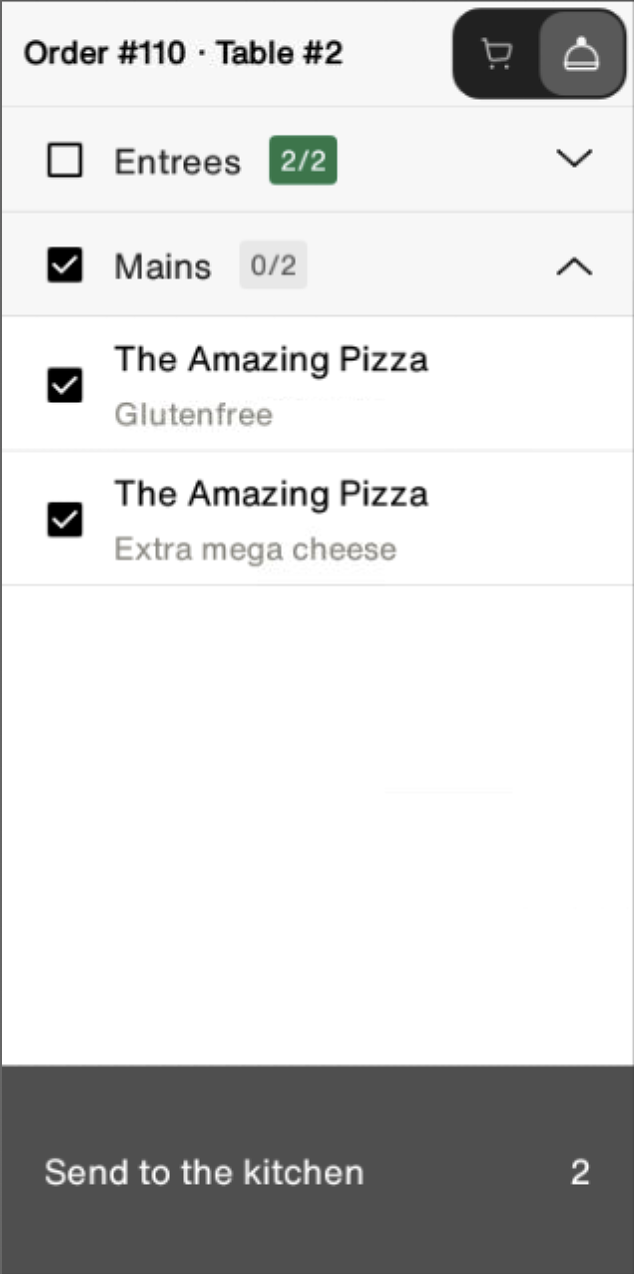
- It will jump back to the Courses view.
- Now you can view your Couses and the products in those.
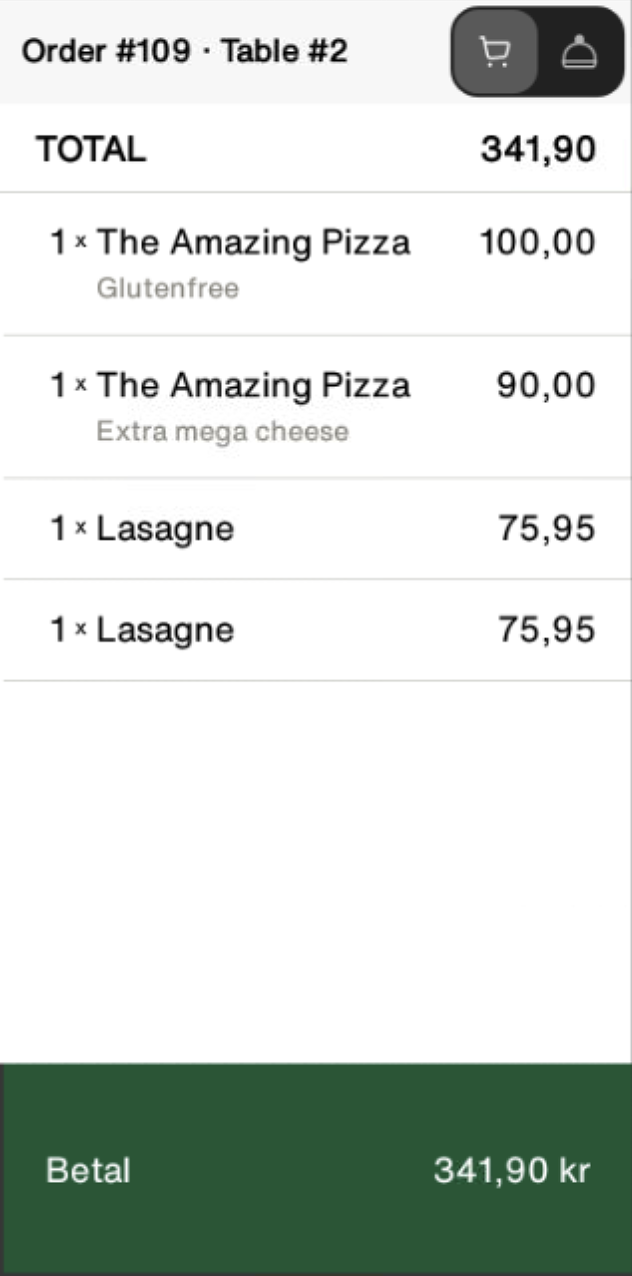

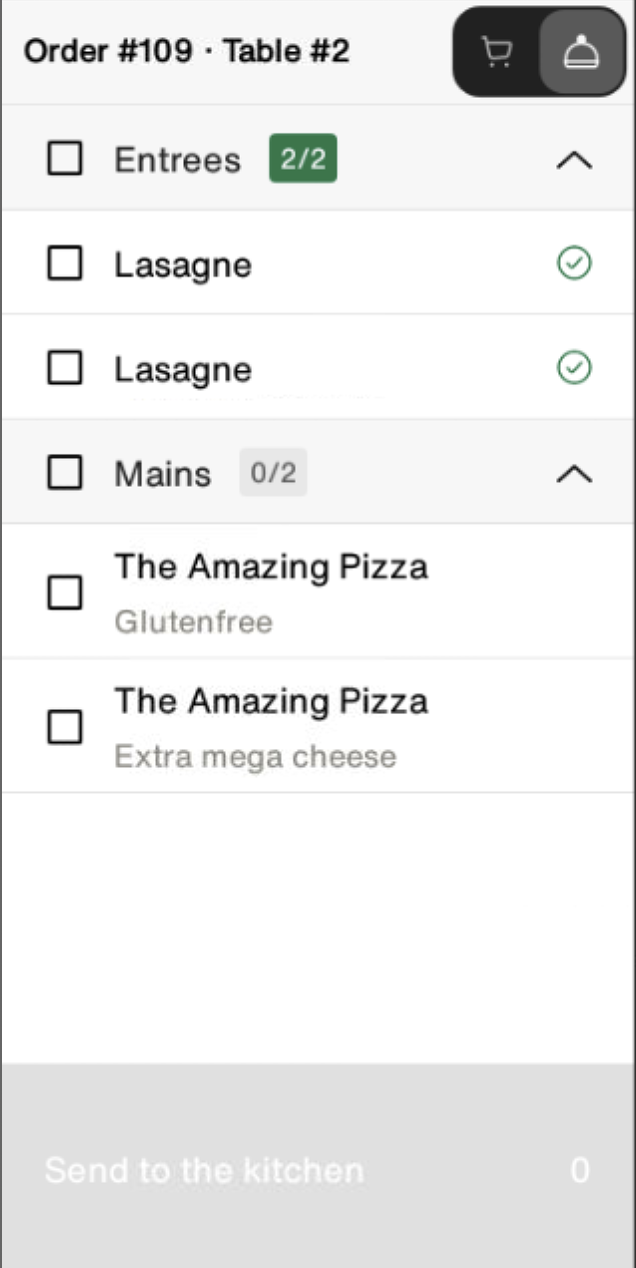
Statuses
- The green check-mark shows that the product has been sent and printed/showed in the kitchen. If you see yellow or red here, you might have a problem you need to investigate. It could be missing paper or anything else like that.