Your staff can take orders tableside with the Pay—Mobile or assign orders to tables from the Pay—Desk Pro for efficient and accurate table service.
Device instructions
Pay—Desk Pro
Open the main menu and tap Tables. Tables can be viewed in Floor plan mode or List mode. You can switch between modes with the buttons at the top of the screen. Tables with orders appear in purple and tables without an order appear in grey.
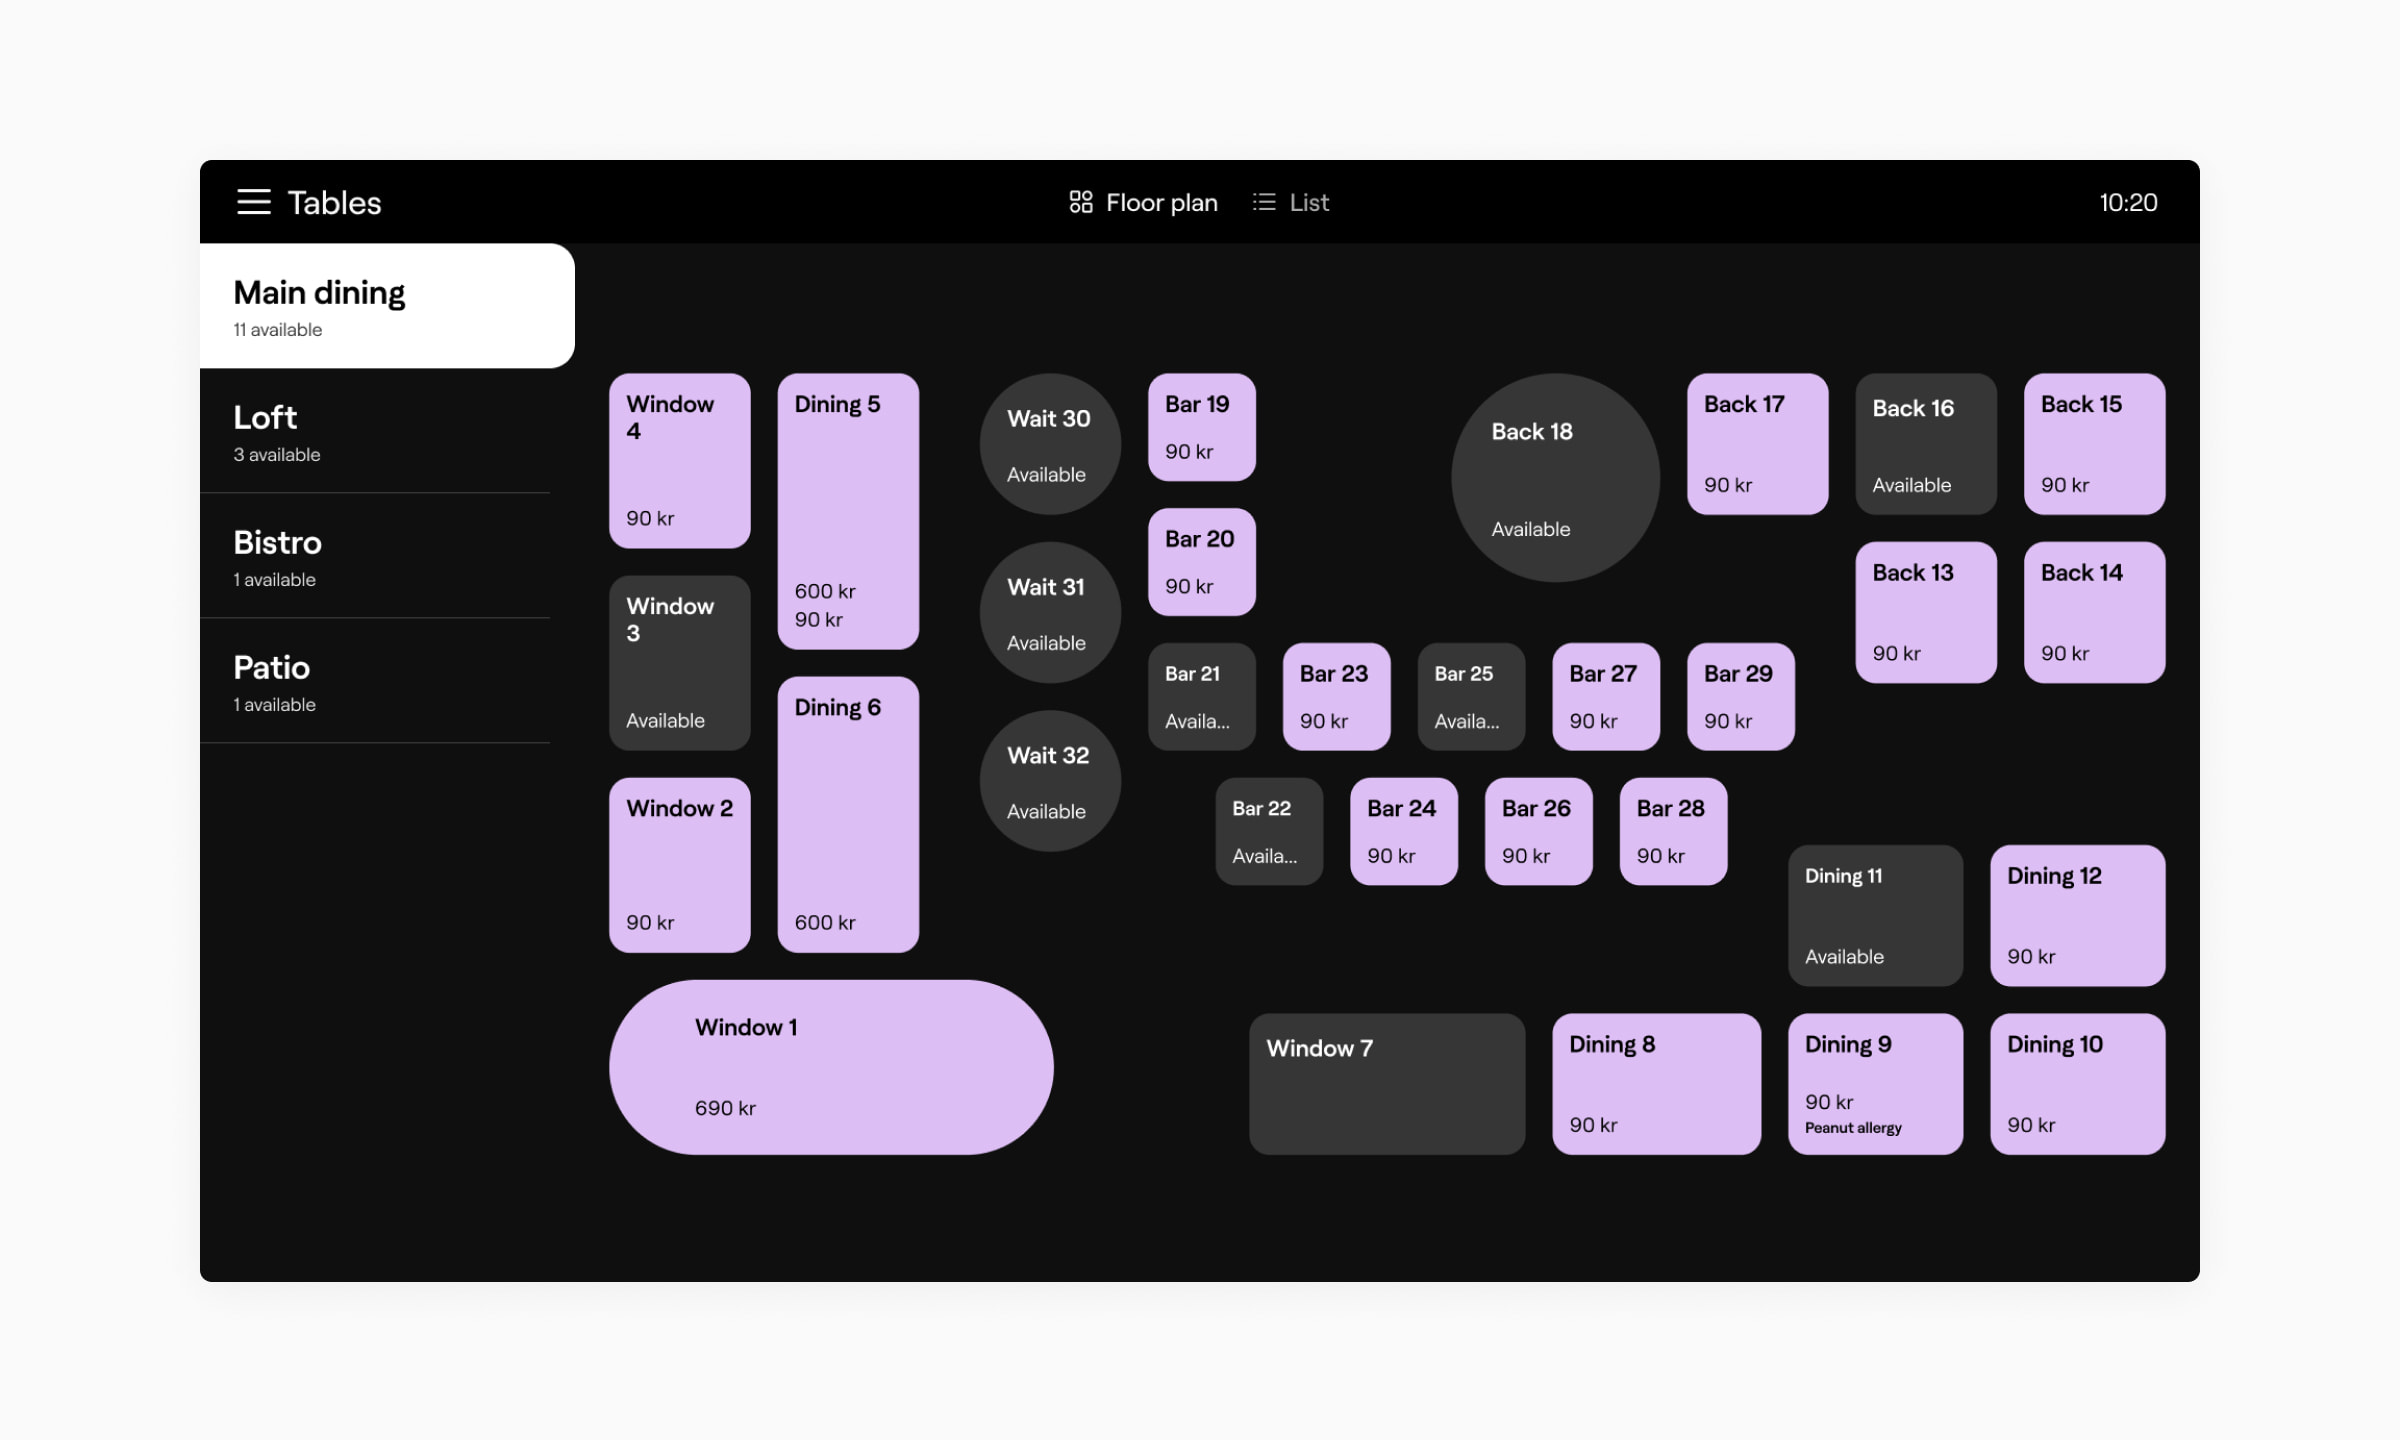
Floor plan mode shows the physical layout of your store or restaurant. On the left is a list of sections you can switch between, and you can change the order of these in the portal— read more in the Table management article.
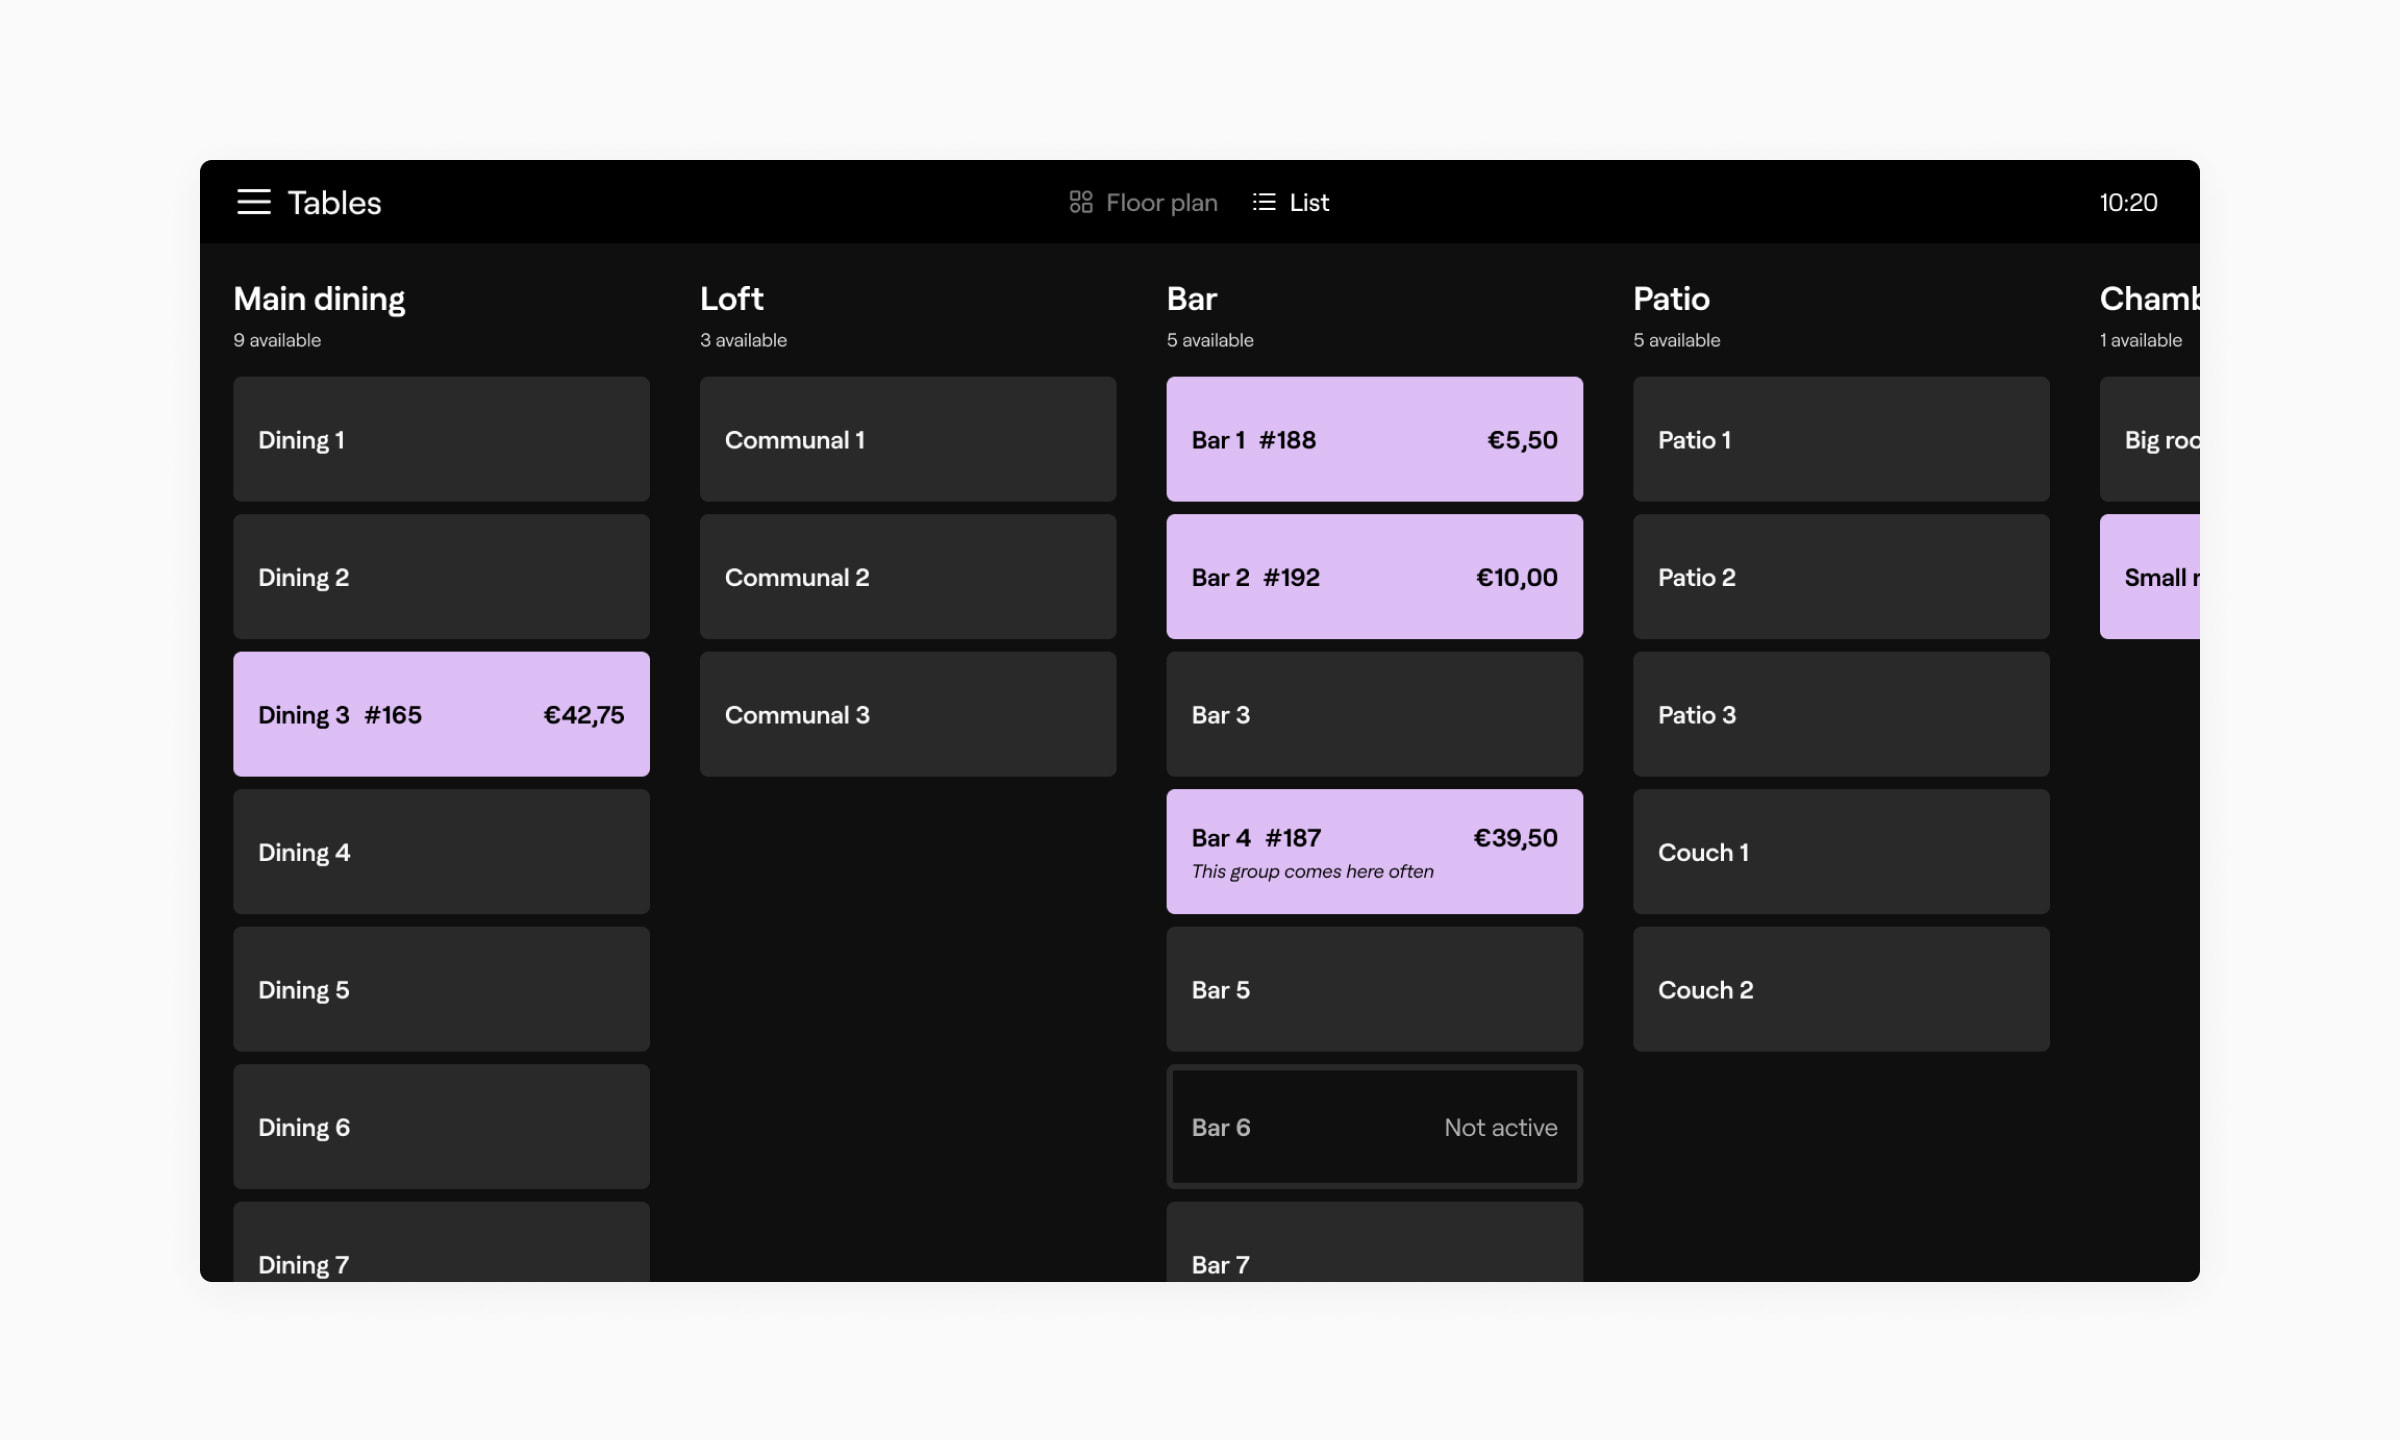
List mode displays tables in multiple sections in a single glance. Swipe up or down in a column to view the tables within that section. Swipe left or right to view additional sections.
Taking an order
- Tap the table you would like to create an order for. The menu will appear.
- Add products to the order like normal. Press Add to the table in the bottom right corner.
- The order will be saved to the table and you will return to the tables view.
Move an order to a new table
- Tap the table you would like to move. The menu will appear.
- Press the Payment button in the bottom left corner to enter the payment view.
- Press Move to other table. You will return to the tables view and a banner at the top will instruct you to choose another table.
- Select a vacant table to assign the order to.
- Your order has now moved to the new table. You will be returned to the menu to make any additional changes to the order.
Pay—Mobile
Open the main menu and tap Tables. Tables can be viewed in Floor plan mode or List mode. You can switch between modes with the buttons at the top of the screen. Tables with orders appear in purple and tables without an order appear in grey.
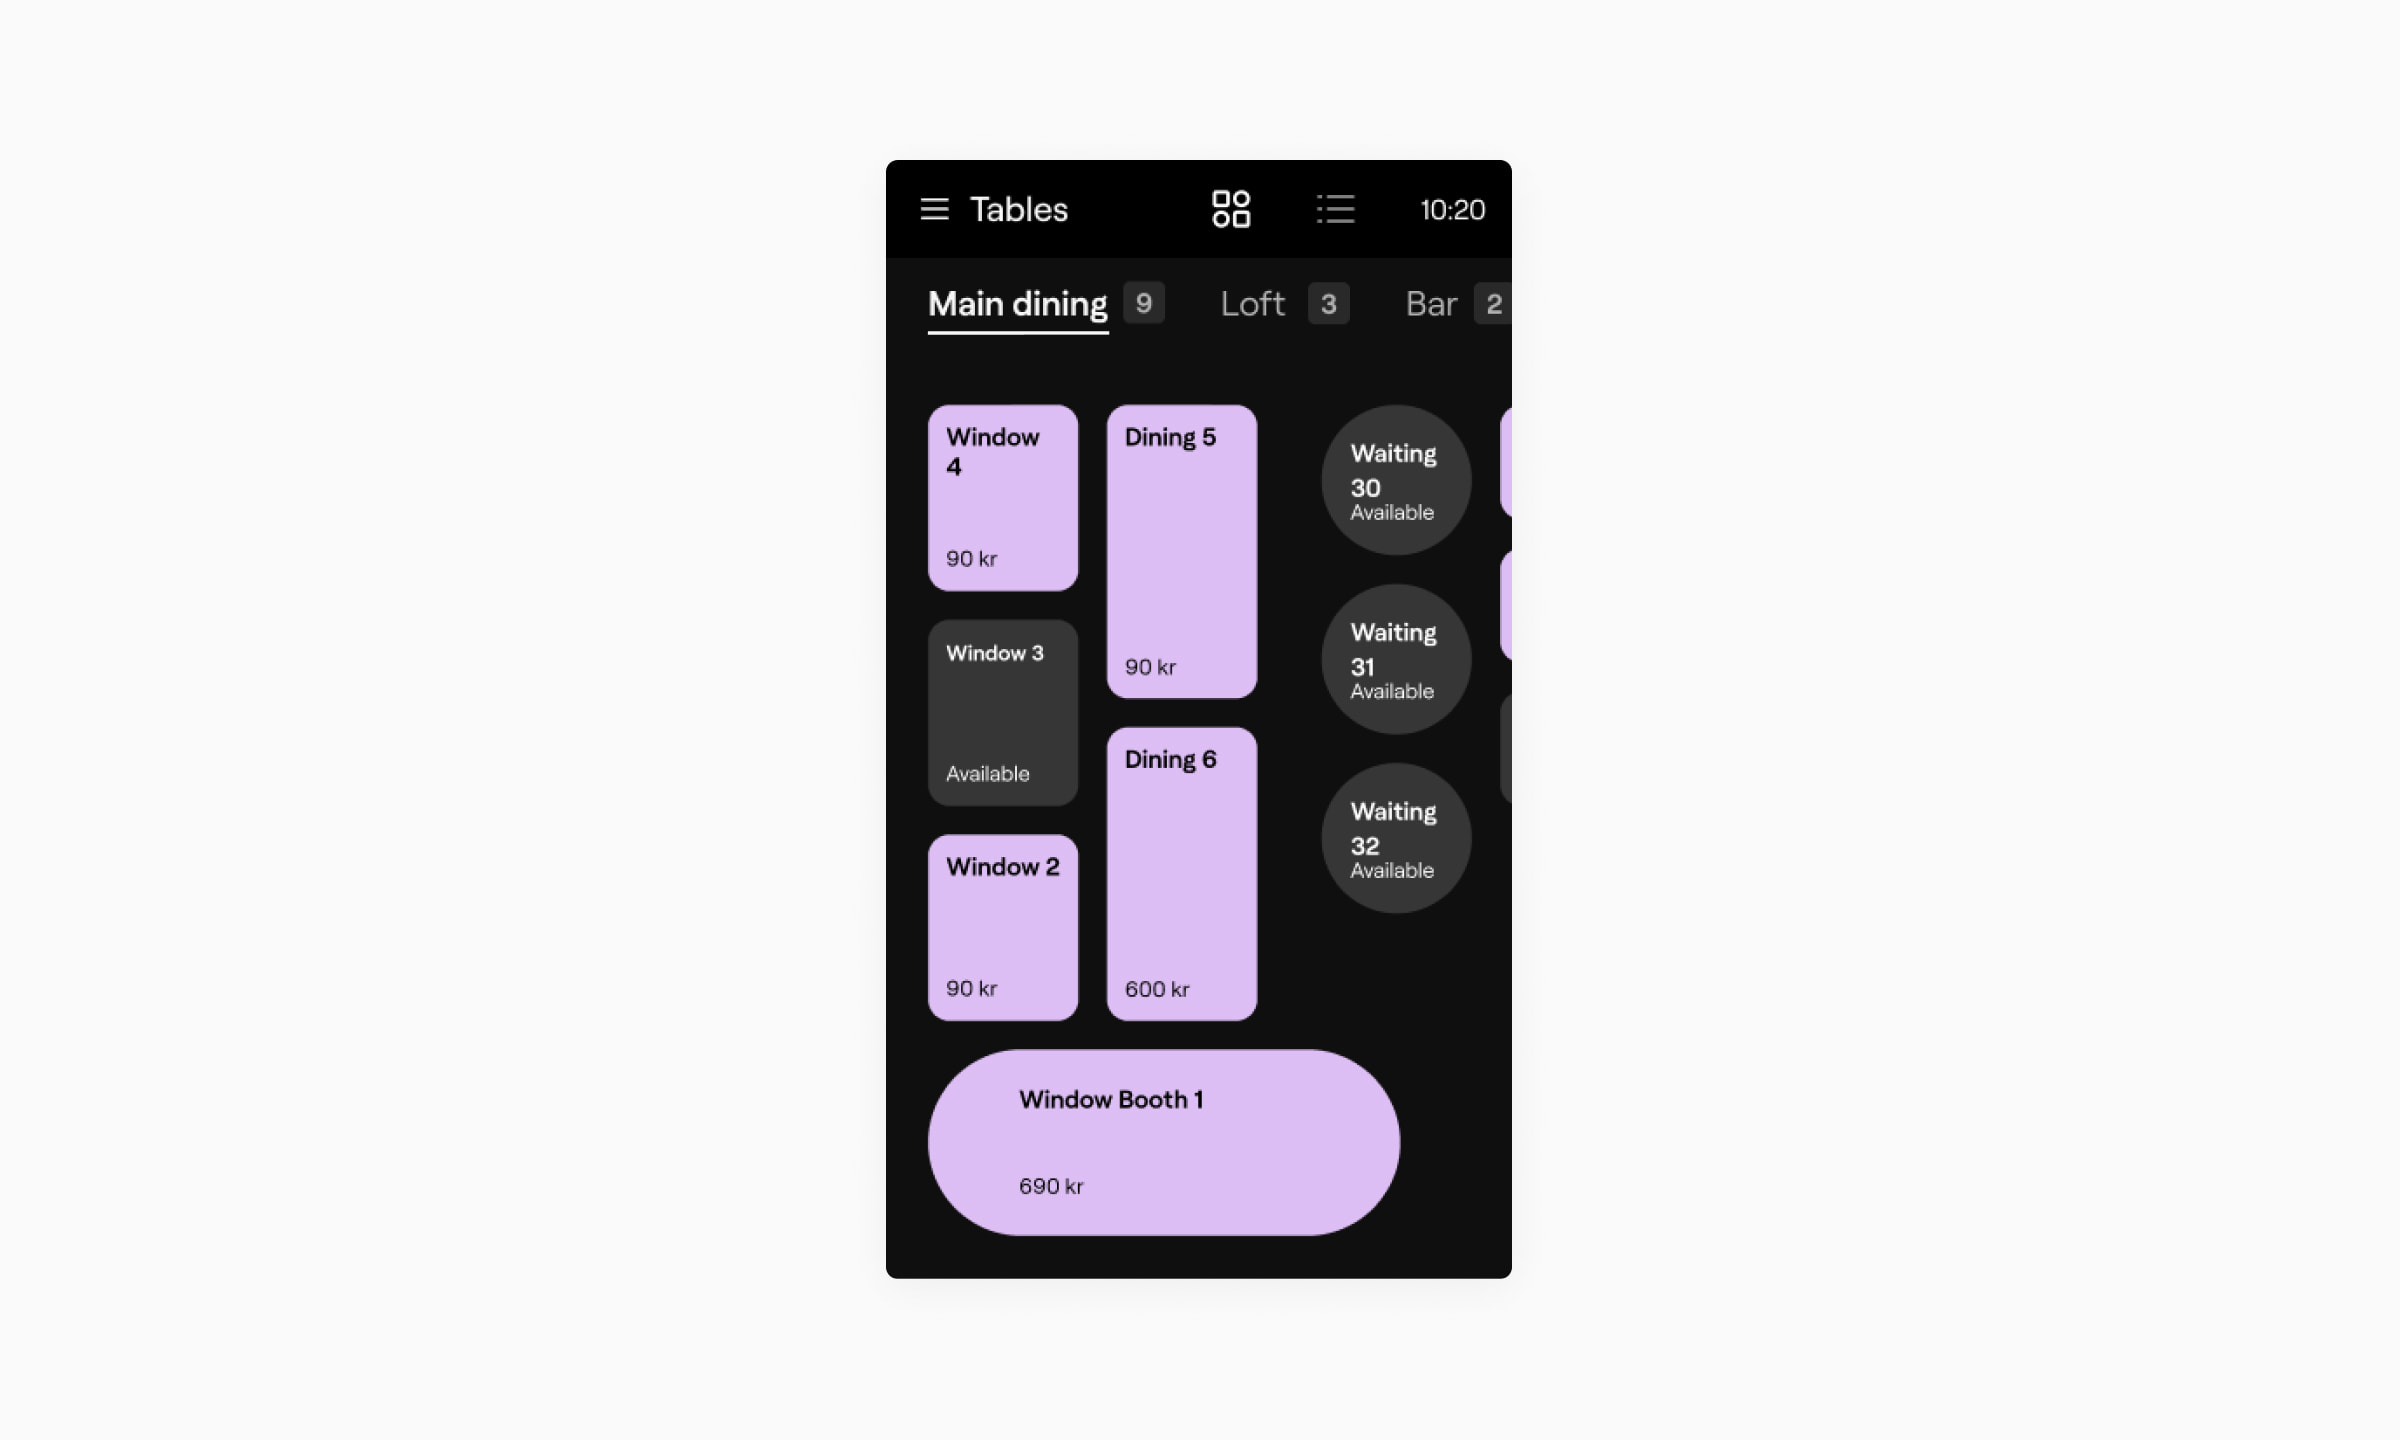
Floor plan mode shows the physical layout of your store or restaurant. At the top is a list of sections you can switch between, and you can change the order of these in the portal— read more in the Table management article.
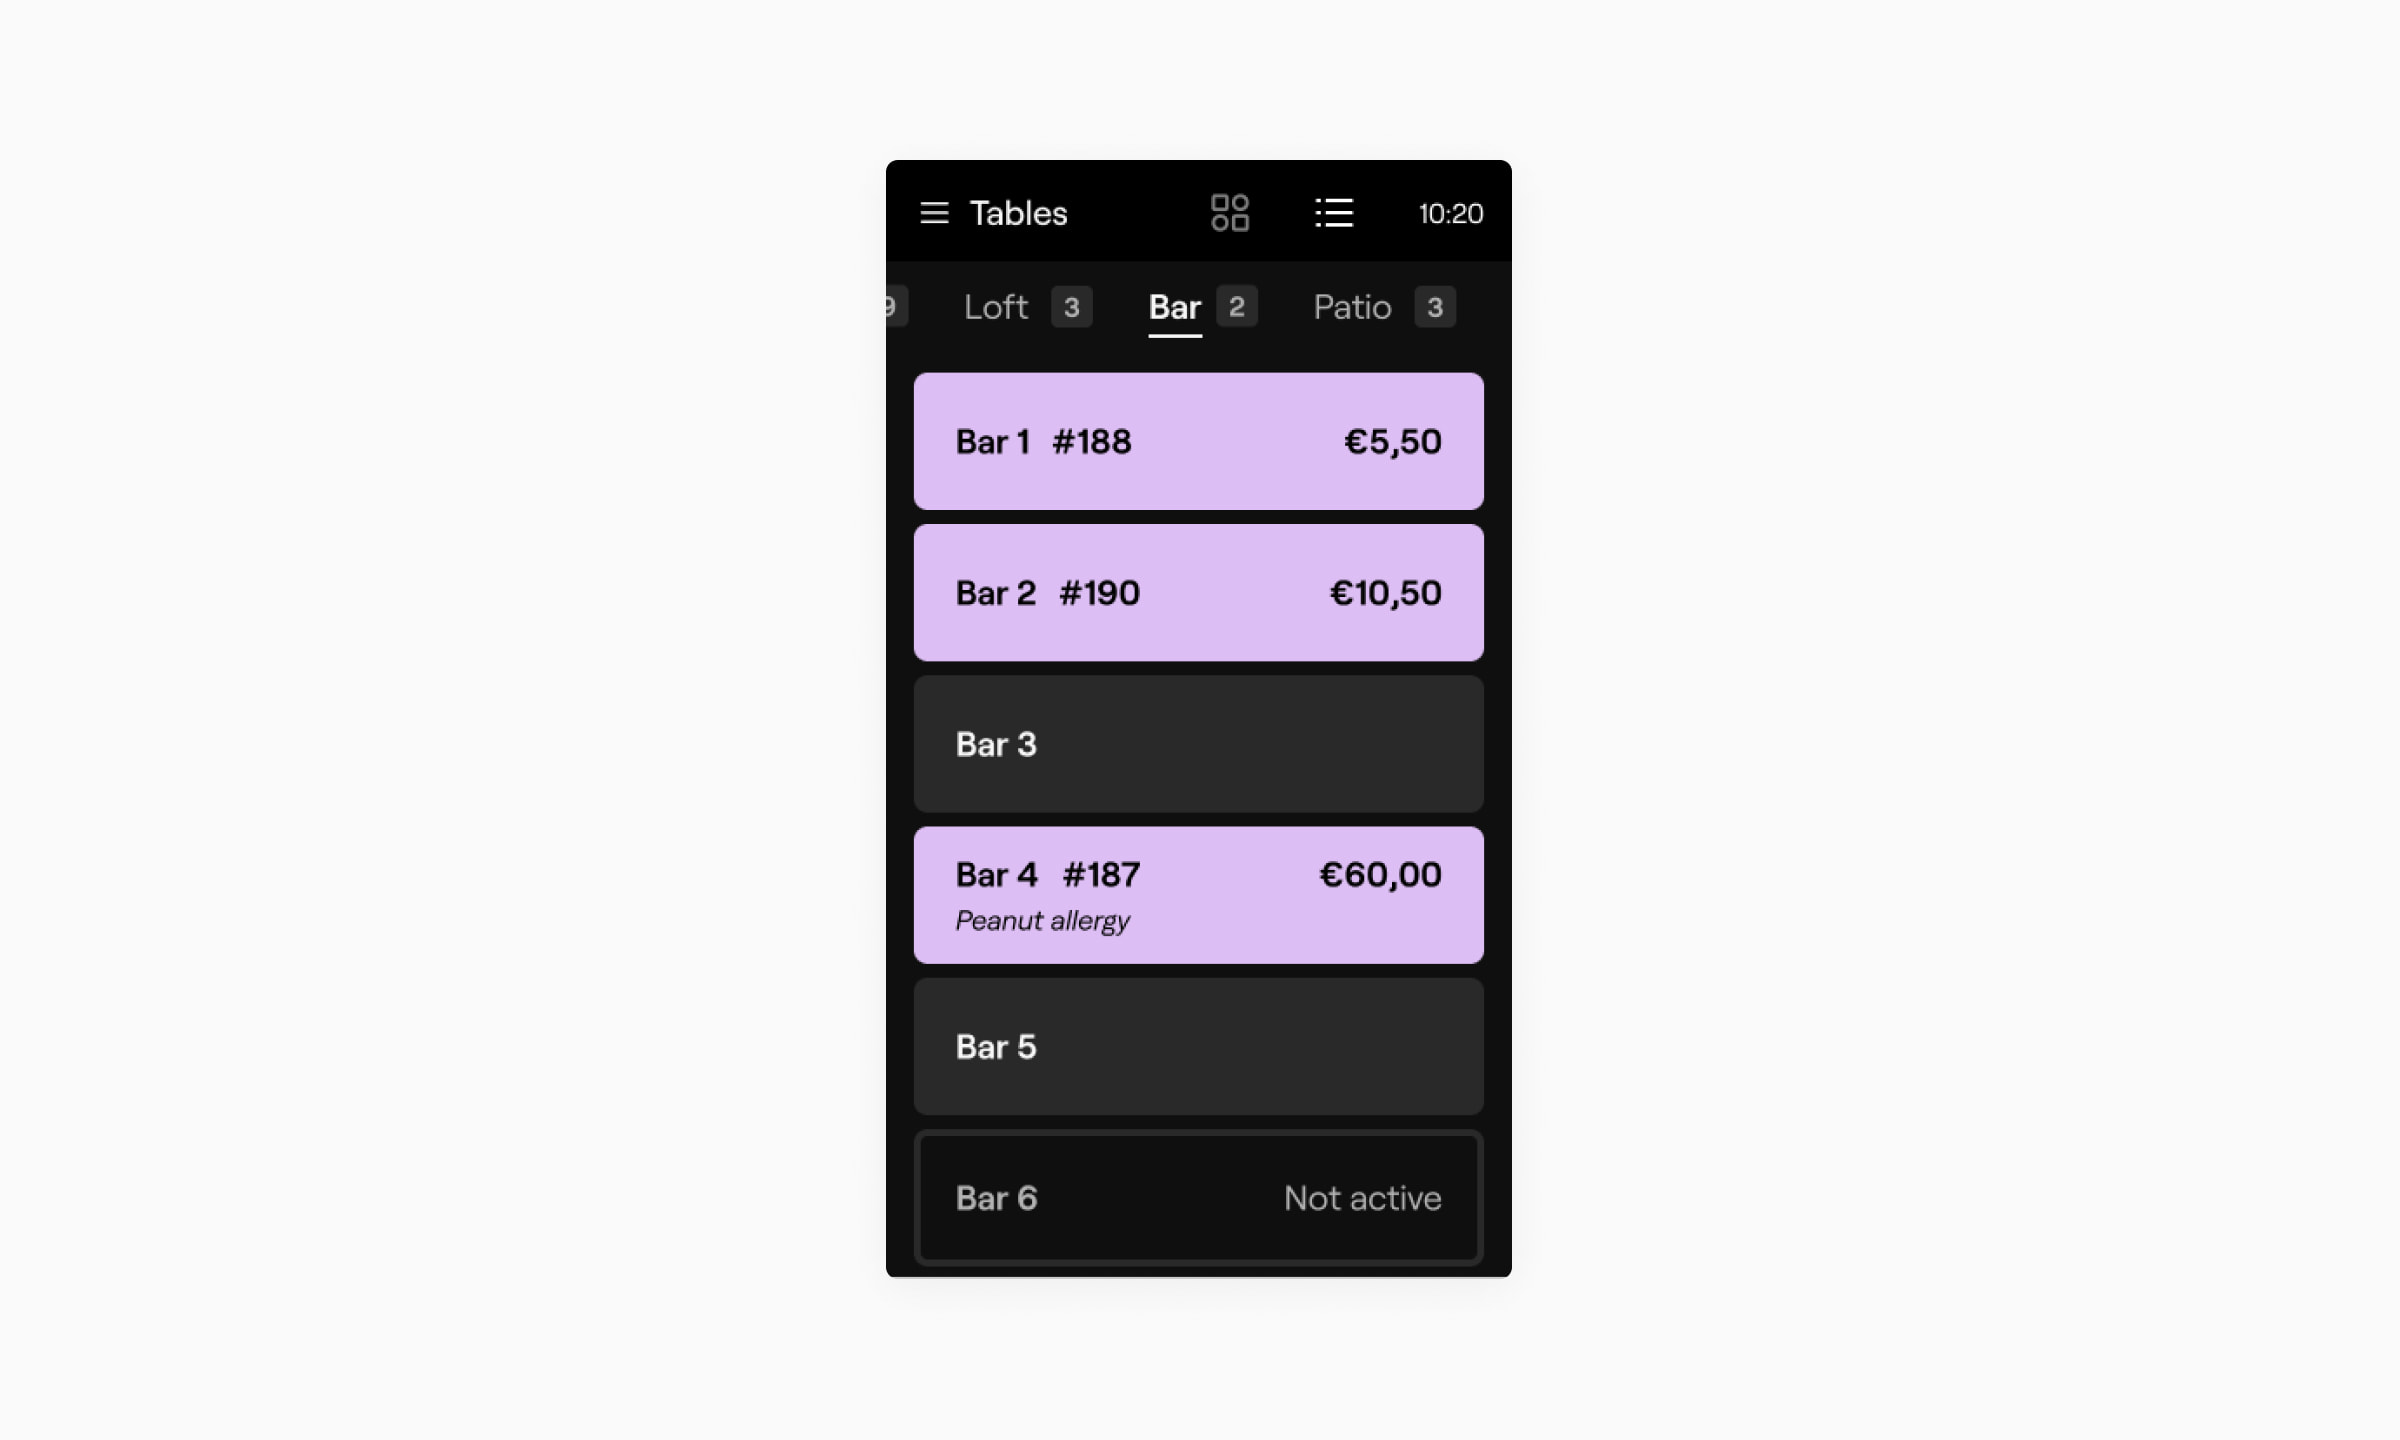
List mode displays tables in multiple sections in a single glance. Swipe up or down in a column to view the tables within that section. Swipe left or right to view additional sections.
Taking an order
- Tap the table you would like to create an order for. The menu will appear.
- Add products to the order like normal. Press Add to the table in the bottom right corner menu.
- The order will be saved to the table and you will return to the tables view.
Move an order to a new table
- Tap the table you would like to move. The menu will appear.
- Go to the Payment view via the bottom right menu and selecting More....
- Press Move to other table. You will return to the tables view and a banner at the top will instruct you to choose another table.
- Select a vacant table to assign the order to.
- Your order has now moved to the new table. You will be returned to the menu to make any additional changes to the order.